
A manual smooth-edge can opener can jam when the cutting wheel loses contact with the rim, the drive gear slips, or the lid bends and wedges between the wheel and the opener body. Dried food, a bent can, or an opener that is slightly misaligned can make the turning knob feel completely stuck.
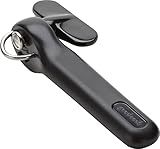
Do not solve the problem by twisting harder. Excessive force can crush the can, spill food, bend the cutting mechanism, or make the lid’s edge unexpectedly sharp—even on an opener designed to leave a smooth rim. The safest approach is to stop turning, release the opener from the can, clean the mechanism, and realign it. These steps work for most handheld smooth-edge models, including compact openers priced at about $8 to $25, such as the GoodCook Safe-Cut Can Opener with Easy Turn Knob (about $8.09) and the OXO Good Grips Smooth Edge Manual Can Opener (about $24.69).
As an Amazon Associate we earn from qualifying purchases at no extra cost to you. Product prices and availability are accurate as of the date shown and are subject to change.

Quick answer: Our top pick in 2026 is the Dish towel or thick kitchen towel — our #1 rated choice. See the full ranked comparison, alternatives and buying advice below.
What You Need
| Item | Why | Optional? |
|---|---|---|
| Dish towel or thick kitchen towel | Improves your grip and protects your hand from the lid or rim. | No |
| Warm water and dish soap | Loosens dried food and grease around the wheel, gear, and hinge. | No |
| Small nylon brush or old toothbrush | Reaches food residue in the cutting and drive-wheel area. | Optional |
| Wooden skewer or toothpick | Helps lift soft debris from narrow gaps without scratching metal. | Optional |
| Food-safe mineral oil | Provides a very small amount of lubrication for a stiff hinge or gear. | Optional |
| Flat, stable work surface | Prevents the can from tipping while you release the opener. | No |
Before starting, move the can away from the edge of the counter. If it is leaking, place it in a bowl or on a rimmed plate. Wash your hands after handling the outside of the can, particularly if the can is dented, rusty, or leaking.
Step-by-Step
1. Stop turning and stabilize the can (30 seconds)
Stop rotating the knob as soon as you feel strong resistance. Hold the can low on its sides with a towel, keeping your fingers below the lid and away from the rim. If the can is badly dented, bulging, or hissing, do not continue opening it. Put it in a sink or sturdy container and discard it according to local guidance.
Look at the opener. Note whether the cutting wheel is sitting on the top of the rim, inside the rim, or against the sidewall. This will help you return it to the correct position after release.
2. Release the opener from the rim (30 seconds to 2 minutes)
Most manual smooth-edge openers separate when you squeeze or relax the handles, depending on the model. Follow the normal opening action in reverse: hold the opener steady, gently open its handles, and rotate the release or adjustment knob backward if the design has one.
Never pry the mechanism sideways with a knife, screwdriver, or other sharp tool. If the opener is still attached, turn the knob backward only a quarter turn at a time while applying light pressure to the handles. The goal is to disengage the drive gear, not to force the lid through the wheel.
Once it releases, set the can down and cover the top with the towel. The lid may still have a sharp edge even if the opener is marketed as smooth-edge.
3. Remove loose food and metal fragments (1 minute)
Inspect the wheel and gear for a curled strip of metal, a small piece of label, or dried food. Lift away loose debris with your fingers only if the part is clearly soft and you can do so without touching a sharp edge. Otherwise, use a wooden skewer or nylon brush.
Do not use steel wool. It can leave fibers in the mechanism and may scratch protective finishes. Do not spray general-purpose penetrating oil onto the opener, because it can contact the food or leave a residue that is not intended for kitchen equipment.
4. Wash the mechanism (2 to 5 minutes)
Apply warm, soapy water to a cloth or toothbrush and clean around the cutting wheel, drive wheel, hinge, and knob shaft. Avoid immersing the opener unless the manufacturer specifically says it is dishwasher-safe or fully washable. Many manual openers have internal springs or bearings that can retain water and later rust.
For hardened residue, hold a warm, damp cloth against the area for 2 to 3 minutes, then brush again. Rinse the cleaned areas with a fresh damp cloth and dry thoroughly with a towel. Rotate the knob by hand while the opener is off the can to check whether the wheel now moves smoothly.
5. Check the wheel, gear, and handles (1 to 2 minutes)
Look for a wheel that is visibly crooked, a gear with missing teeth, a loose handle, or a hinge that does not close evenly. The cutting wheel and drive gear should meet in a consistent line. If one side is higher than the other, the opener may have been dropped or forced against a thick rim.
Test the handles without a can. They should open and close without grinding, binding, or requiring more than light hand pressure. If the hinge is dry but otherwise intact, place one tiny drop of food-safe mineral oil on the hinge—not on the cutting edge or any surface that touches food—then open and close the handles several times. Wipe away all excess oil.
6. Reposition it on a fresh section of rim (1 minute)
Use a new can rather than immediately retrying the damaged one. Set the opener so the drive gear grips the rim and the cutting wheel sits where the manufacturer intends. On a smooth-edge model, the cutting action is usually along the side or underside of the lid rather than through the top surface.
Close the handles firmly but gently. The opener should grip without crushing the can wall. If the handles will not close evenly, remove it and reposition it; do not compensate by squeezing harder.
7. Turn slowly and stop at the first resistance (1 to 3 minutes)
Turn the knob in the normal direction using steady, moderate pressure. A typical can may take several rotations, but the exact number depends on its diameter and the opener’s gear ratio. Keep the can level and watch the wheel for the first quarter turn.
If the knob becomes difficult again, stop immediately and reverse it slightly. Remove the opener and inspect the rim. A dent, thick seam, or lifted lid can prevent smooth-edge models from tracking correctly. Do not continue if you see a sharp curl of metal, a leaking seam, or a can that is swelling.
Mistakes to Avoid
- Forcing a stuck knob: This can strip the drive gear or bend the cutting wheel.
- Using a knife as a lever: The knife can slip, and the lid can spring free unexpectedly.
- Holding the lid with bare fingers: Smooth-edge claims do not guarantee that a damaged or bent lid is harmless.
- Opening a badly dented or bulging can: Discard it rather than trying to save the contents.
- Soaking the entire opener: Trapped moisture can cause rust and stiffness.
- Adding too much lubricant: Oil can migrate onto food-contact areas and attract dust.
- Testing on a very large can first: Start with a standard can around 15 ounces to 16 ounces, which is easier to control than a 28-ounce or larger can.
How Often
Wipe the opener after every use, especially around the wheel and gear. Wash it promptly if it touches syrup, tomato sauce, meat juices, or other sticky foods. A more thorough brush cleaning every 5 to 10 uses is sensible for frequent users. Inspect the mechanism about once a month, or whenever the knob feels rough.
Store the opener completely dry in a drawer or utensil holder. Keeping it loose in a drawer with heavy tools can bend the handles or dull the wheel. Do not sharpen the cutting wheel yourself; its angle and alignment are part of the safety design.
When to Call a Pro or Replace
A manual can opener is generally inexpensive and not economical to repair professionally. Replace it if the wheel is cracked, the gear has missing teeth, the handles are bent, the hinge is loose, or the opener repeatedly jams after cleaning and correct repositioning. Replacement prices commonly range from about $8 for a basic model to $25 or more for a larger soft-grip opener.
Stop using it immediately if metal flakes appear, the wheel wobbles, or the opener leaves jagged metal on multiple cans. A manufacturer may offer a warranty inspection for a newer premium model, but do not mail or transport an opener with a sharp lid still attached to it.
FAQ
Why does my smooth-edge can opener keep spinning without opening the can?
The drive gear may not be gripping the rim, or the cutting wheel may be positioned too high or too low. Release the opener, clean both wheels, and reattach it to a straight section of rim. If the gear spins freely with no can attached, its teeth may be worn.
Can I unjam a can opener while it is still attached?
Try only the gentle release method described above. Do not twist the can, pull the lid, or pry the opener sideways. If it will not release with light handle pressure and a small backward turn, place the can in a stable container and replace the opener rather than risking a cut.
Is a smooth-edge can opener safer than a traditional one?
It is designed to leave a less sharply cut rim, but the lid and can seam can still be hazardous if bent, damaged, or handled carelessly. Keep the lid away from children, pets, and bare fingers, and inspect the rim before removing it.
Should I throw away food from a can that jammed?
Not automatically. If the can was sound, stayed clean, and opened without leaking or bulging, transfer the food to a clean container and refrigerate it promptly. Discard food from a leaking, swollen, rusty-through, or badly dented can, or anything with an unusual odor or appearance.
Ready to decide? Our #1 pick for 2026 is the Dish towel or thick kitchen towel.
Live price & availability on Amazon.






Write Your Review
No reviews yet. Be the first to share your experience!